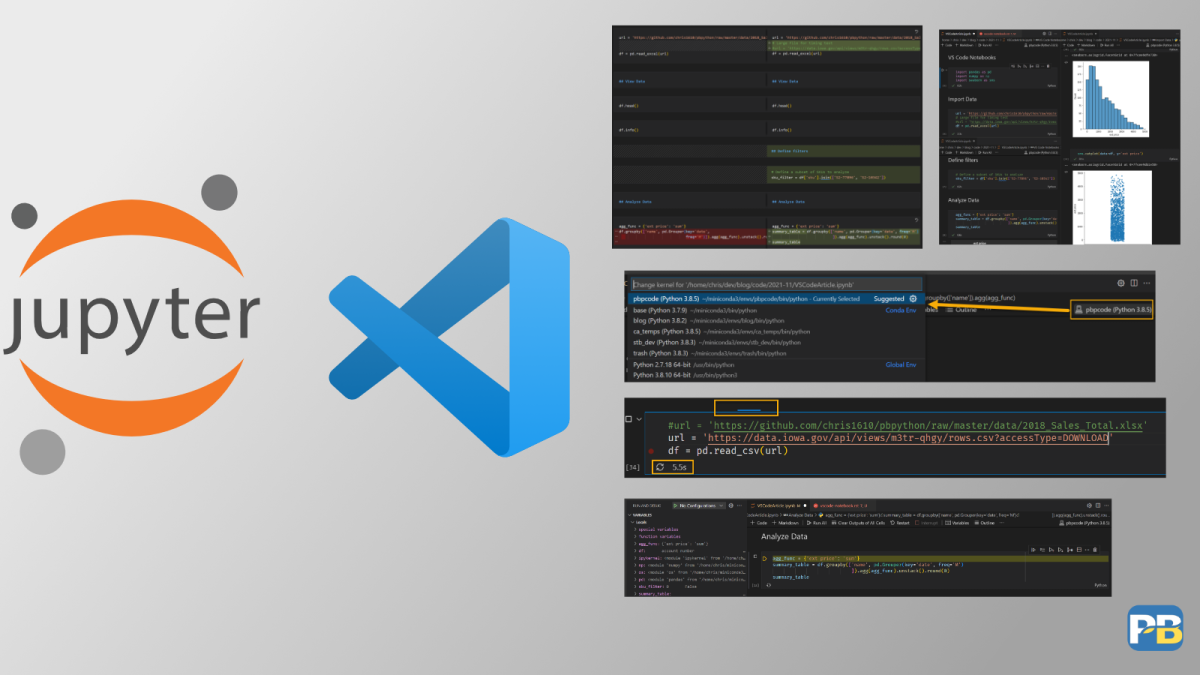
16 Reasons to Use VS Code for Developing Jupyter Notebooks
Posted by Chris Moffitt in articles
Introduction
Visual Studio Code is one of the most popular text editors with a track record of continual improvements. One area where VS Code has been recently innovating is its Jupyter Notebook support. The early releases of VS Code sought to replicate existing Jupyter Notebook features in VS Code. Recent VS Code releases have continued to develop notebook features that provide an experience that in many cases is better than the traditional Jupyter Notebook experience.
I am a big fan of using Jupyter Notebooks for python analysis - even though there are limitations. For the type of adhoc analysis I do, the notebook combination of code and visualizations is superior to working with ad hoc Excel files. That being said, there are times when I wish I had a more full-featured editor for my notebook code.
In this article I will cover 16 reasons why you should consider using VS Code as your editor of choice when working with python in Jupyter Notebooks. I am not including them in any particular order but think number 11 is one of my favorites.
1 - A single editor for many languages
It is very likely that your workflow includes working with multiple file or language types. If you are working with HTML, YAML, JSON, CSS or Javascript files, then it is beneficial to have one editor.
For example, VS Code is extremely customizable so you can configure your themes, colors, fonts and so much more to make your development environment your own. If you’re already editing text files with VS Code, why not start using it for notebook development?
2 - Supports multiple python file types
If you are working with python, you have three distinct options for editing files:
- standalone .py files
- python code cells
- Jupyter Notebooks (
.ipynb)
VS Code supports all editing approaches so you can build streamlit apps as standalone files or prototype your work in a notebook - all from the same editor.
3 - Execution time
One simple but handy benefit is that each cell shows a moving progress bar when executing code and shows how many seconds it takes to execute. If you have processes that take seconds or longer to run, this little feature is very helpful and is available out of the box.

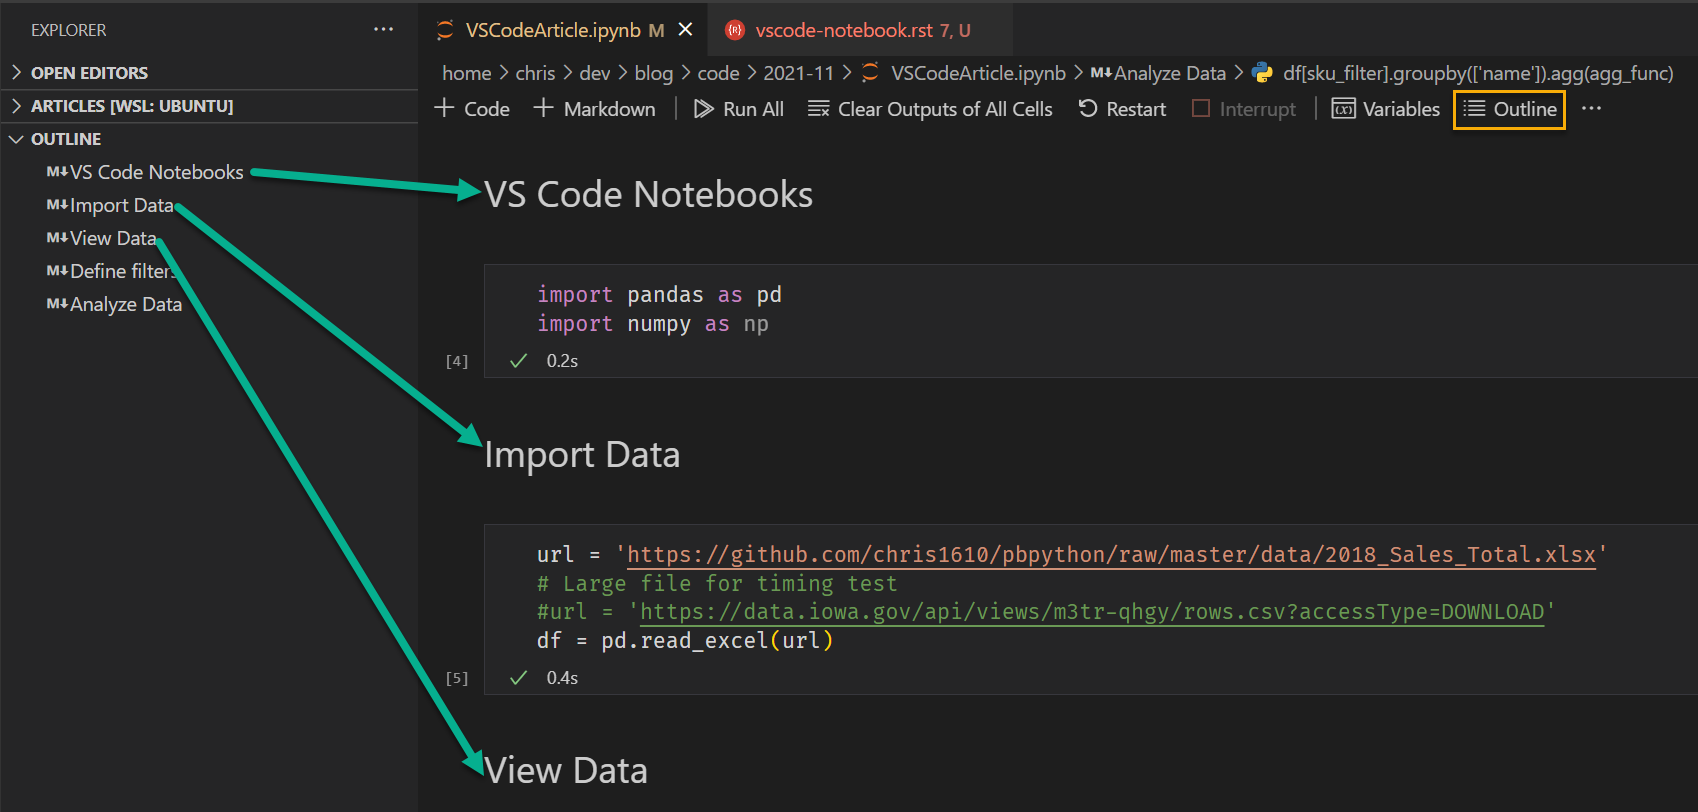
4 - Outline mode
A big challenge with standard notebooks is that they can be difficult to navigate. VS Code includes an outline mode that makes it easy to build a table of contents with Markdown.
If you define a Markdown cell and use Markdown formatting for headings . You can jump to a section of your code by clicking on the link in the outline panel.
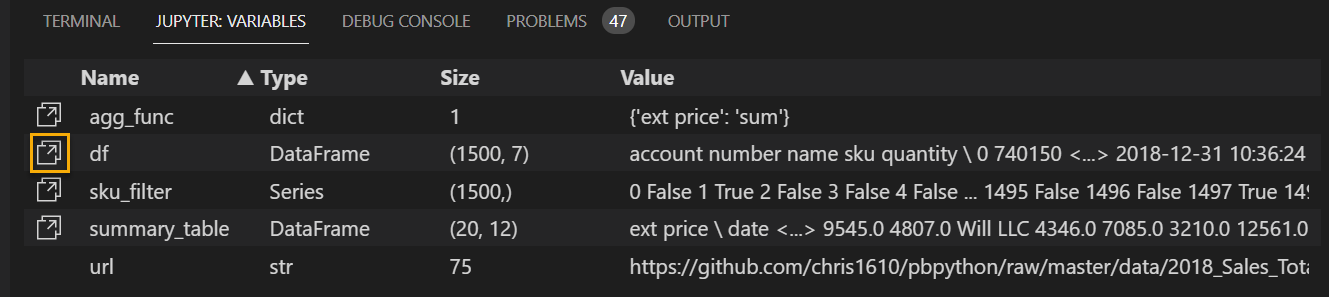
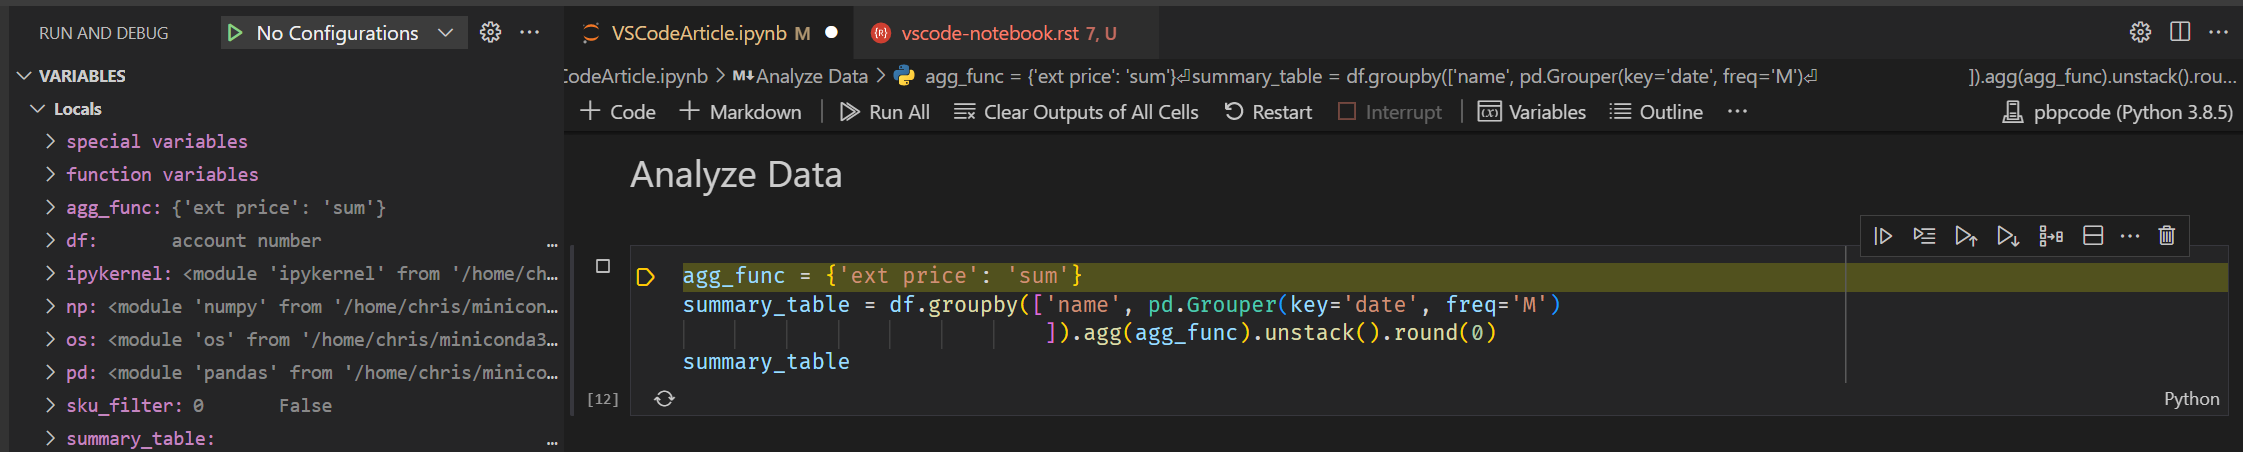
5 - Jupyter variable explorer
Do you forget your variable names? Did you call the customer variable
cust
or
customers
?
I spend a lot of time scrolling through notebooks trying to remember names. The Jupyter
variable explorer fixes this problem and shows additional helpful info about the size and
type of each variable.
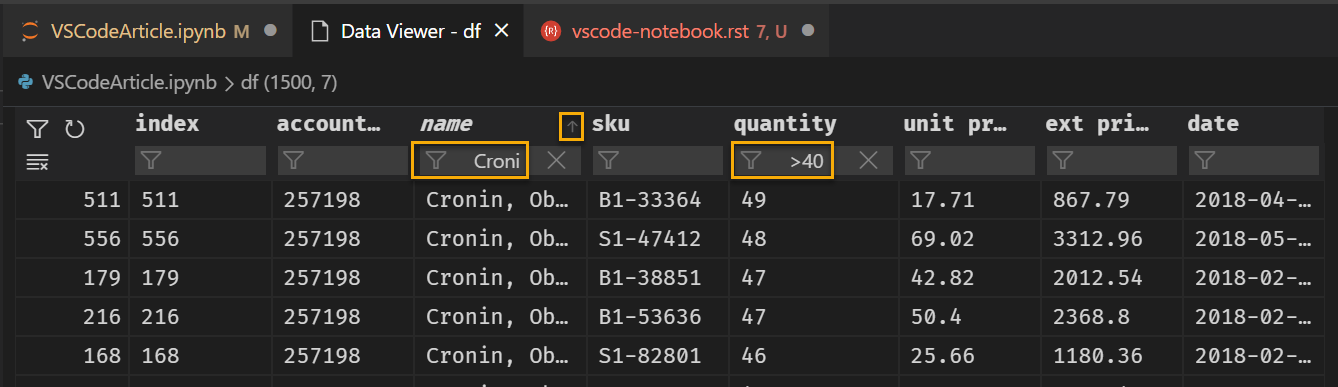
6 - Data viewer
The variable explorer also allows you to view a DataFrame or Series in a separate tab. I find this really useful for remembering column names or to quickly inspect and filter data. Without the viewer, I would normally export data to Excel and inspect it. The viewer removes much of that need.
7 - Code formatting
I really like using a consistent code formatter like yapf or black to format some of the more complex pandas code. VS Code will apply the formatter of choice to clean up your nested code. Consistent, readable code makes the debugging process much easier.

8 - Cell debugging
If you want to invoke a rich debugging environment, you can access this functionality with VS Code. One of the easiest ways to invoke it is to press F10 to run a multi-line cell in line by line mode.
You now have access to the debugging environment for more complex problems.
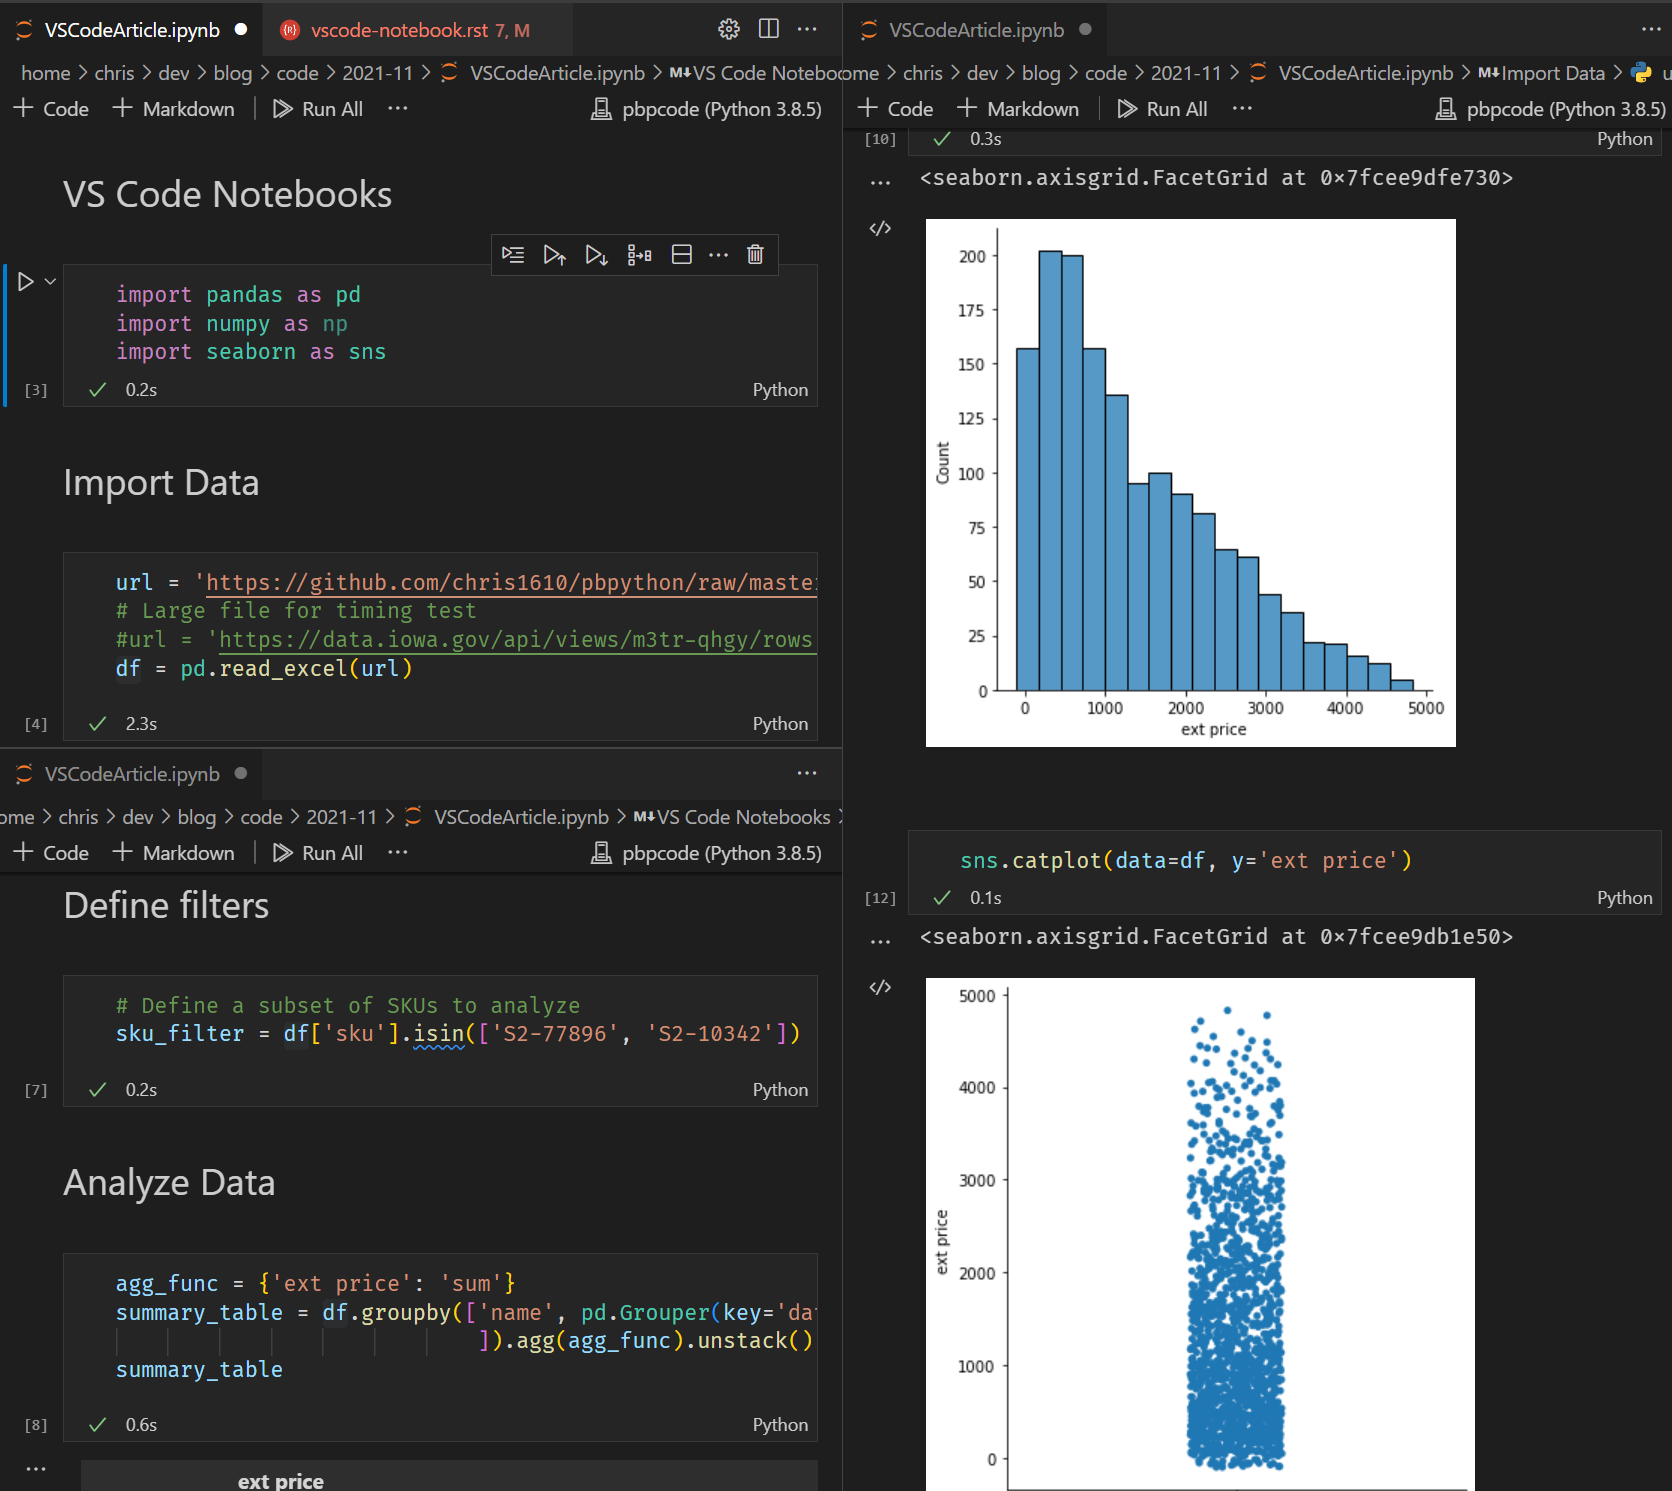
9 - Split editors
Sometimes you may want to have multiple windows with the code visible. VS Code allows you to split and configure your editors in as many configurations as you can imagine. It’s not as easy to do this with the standard notebook interface.
Here is one example with multiple panes open for one notebook.
10 - Git integration
VS Code integrate seamlessly with git. For instance, you can see a timeline view for your commit history.

11 - Better diffs
This may be one of the biggest reasons to consider using VS Code. Your notebook diffs are easier to decipher! One of the biggest complaints about notebook files is that there is a lot of extra meta-data and output information that makes it really difficult to see diffs correctly. VS Code does some clever work to make diffs useful for notebooks.
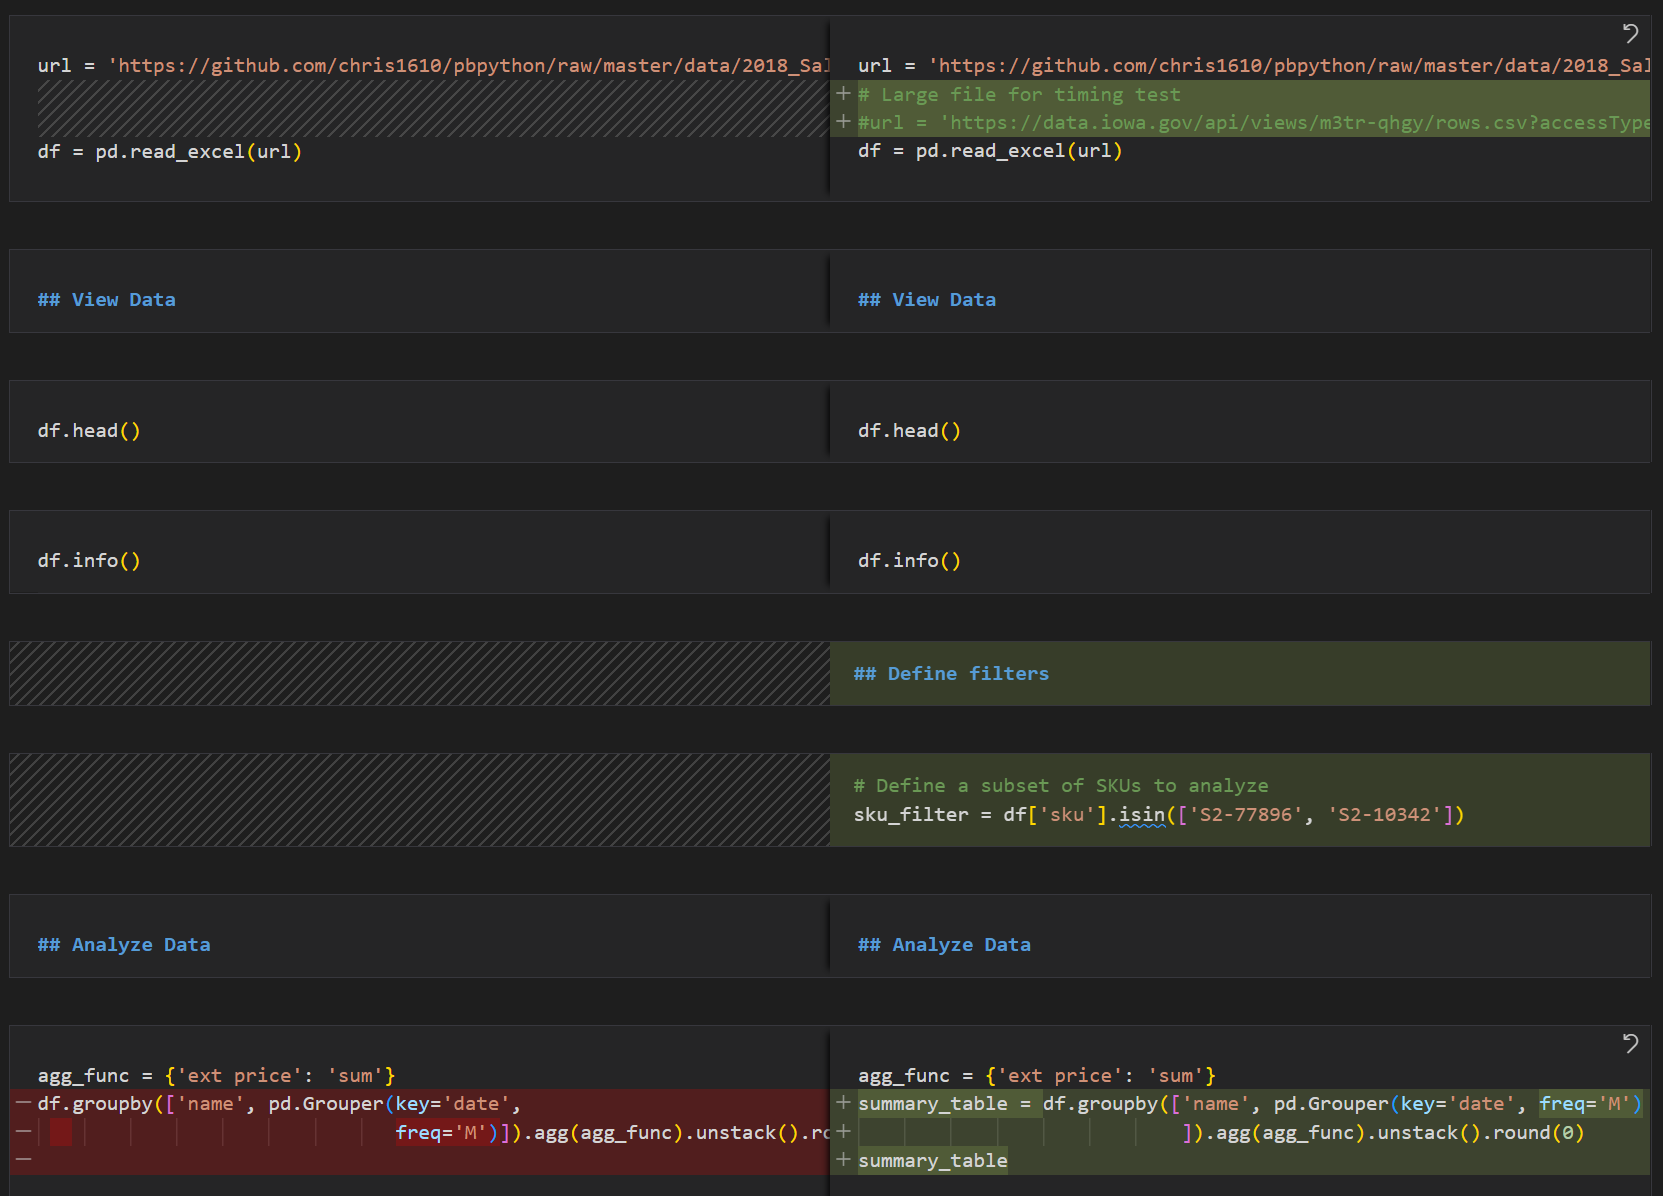
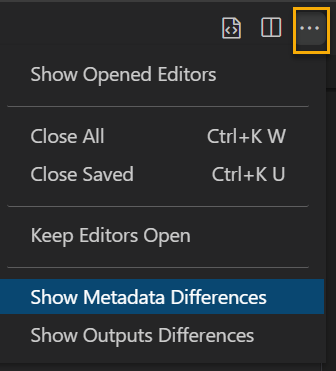
One of the configuration options is the option to hide the differences in metadata or output so you can just focus on code changes.
In my opinion this diff feature is really a game changer for working with notebooks and git.
12 - Intellisense
VS Code will try its best to help you complete your code and show documentation right in
your editor. If you can’t remember if the parameter is
sheet
or
sheet_name
then Intellisense wil help avoid many of those unnecessary google searches.
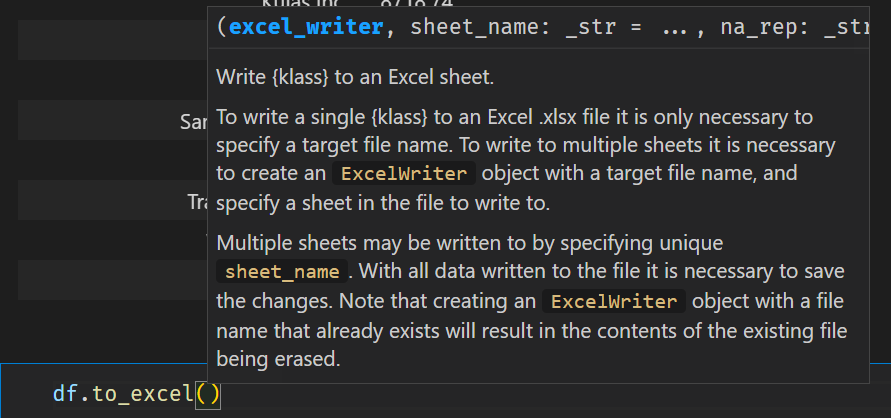
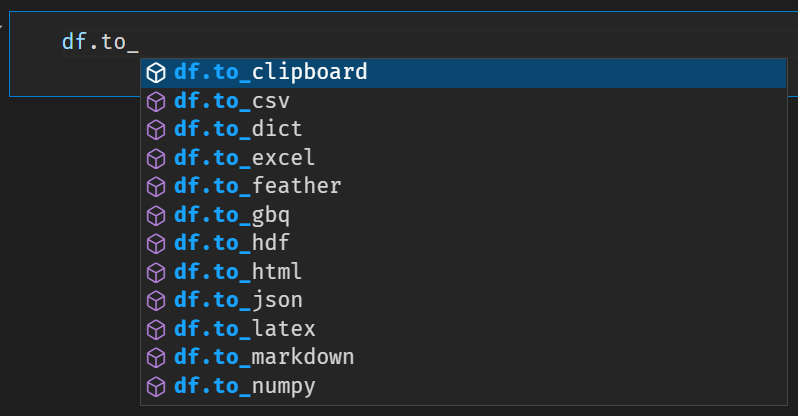
Intellisense can also help you use some of those pandas functions you just can’t remember without looking them up:
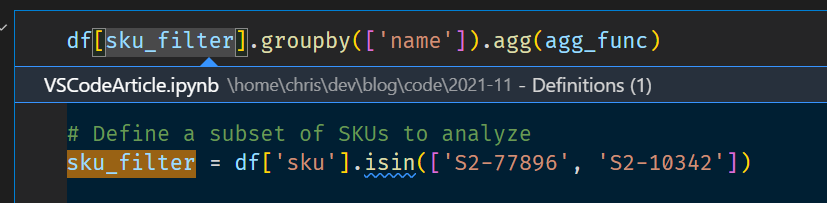
13 - Variable peeking
Variable peeking allows you to see how a variable is defined without have to scroll through
your code. In this example, if you can’t remember what
sku_filter
was set to, you
can highlight
sku_filter
and press Alt+F12 to see this summary overlay.
14 - Gather code
Outside of diffs, one of the biggest complaints about the notebook environment is that it is too easy to get your order of execution out of sync. If you are doing some ad-hoc analysis and want to recreate a specific output, you can use the gather code function to filter down the notebook to the specific code that is used to derive the output in a cell.
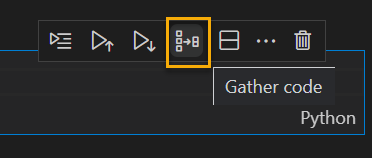
That code is then shown in a separate notebook.
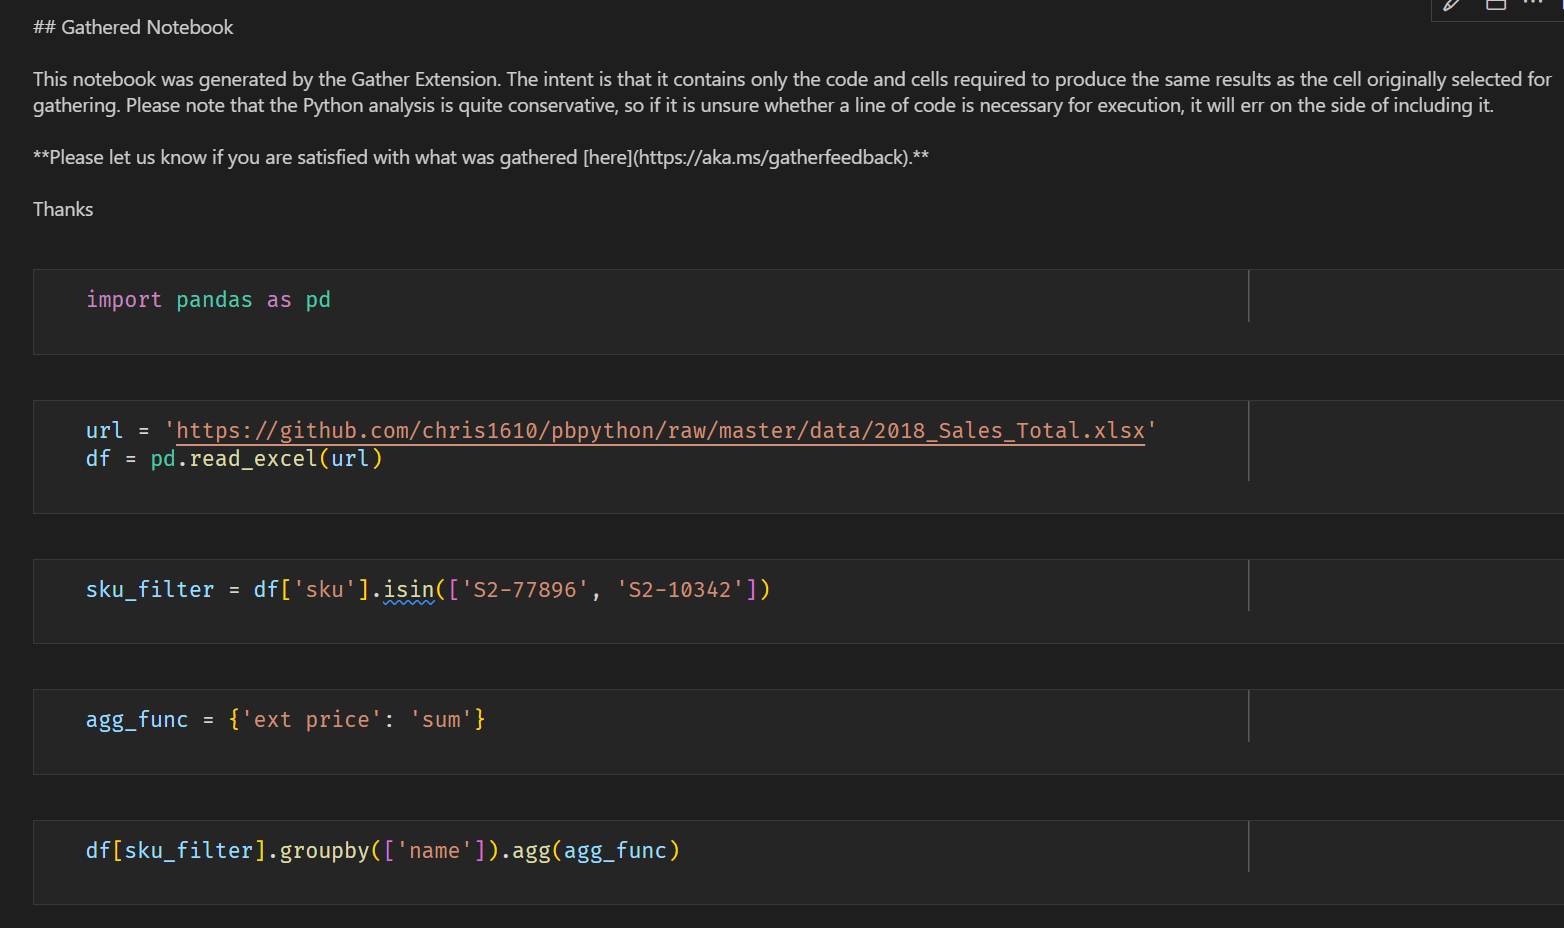
This is really useful if your notebook execution order gets way out of order.
12 - Snippets
Software development and data analysis involves a lot of repetitive code (i.e. copy and pasting).
The VS Code snippets functionality can streamline some of this process. Here is a very simple
snippet that will include two imports whenever you type
si
. You can configure
more complex examples too.
Access python snippets:

Create the snippet:
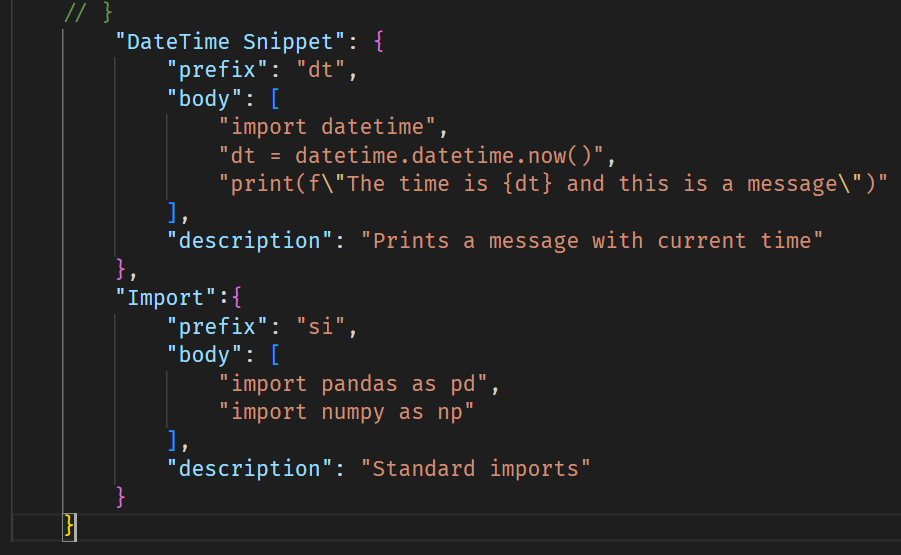
Snippet in action:

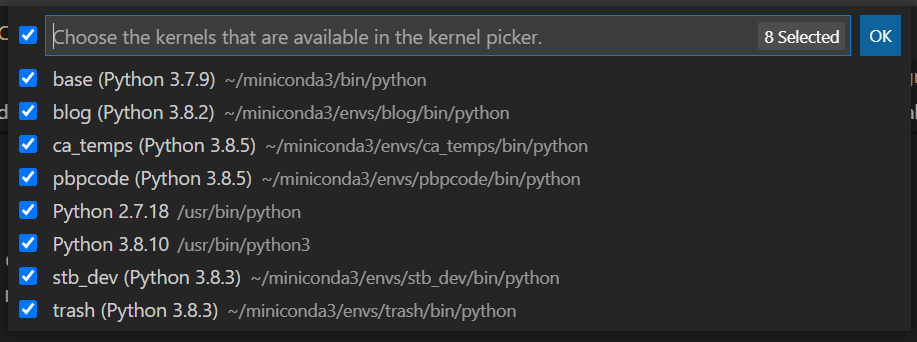
12 - Change kernels
If you are using conda or virtual environments, it is very useful to be able to quickly change your notebook’s environment.
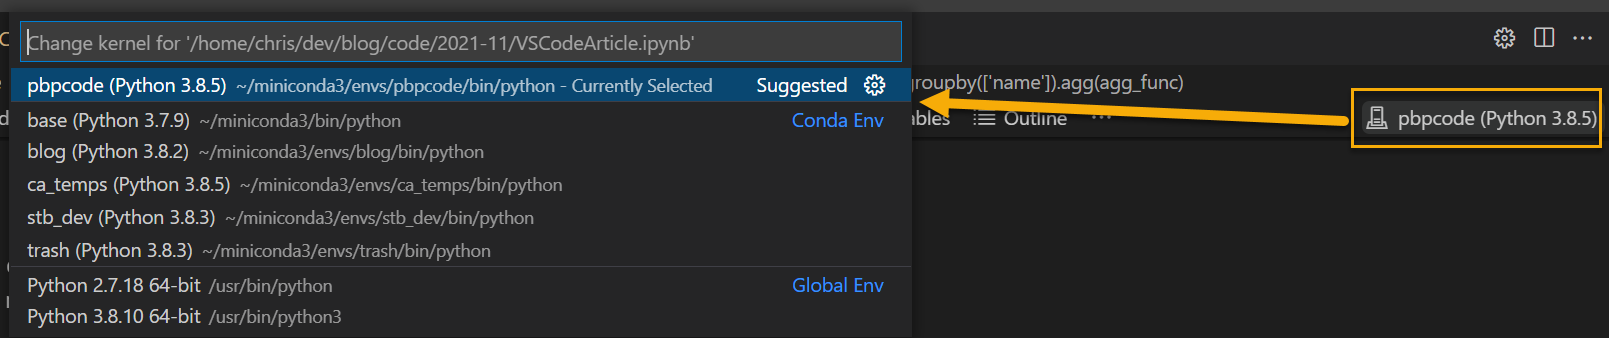
With the October 2021 release, you can also filter this list (if you want to get rid of the “trash” environment). Get here by searching for Jupyter: Filter kernel.
13 - Connect to remote server
If you have a remote Jupyter server, you can connect to that as well.


14 - Supports WSL
I have written about using WSL in the past. VS Code integrates well with WSL so you can develop on Windows or Linux with a simple integrated approach. With Windows 11, the WSL installation process is even easier than before.
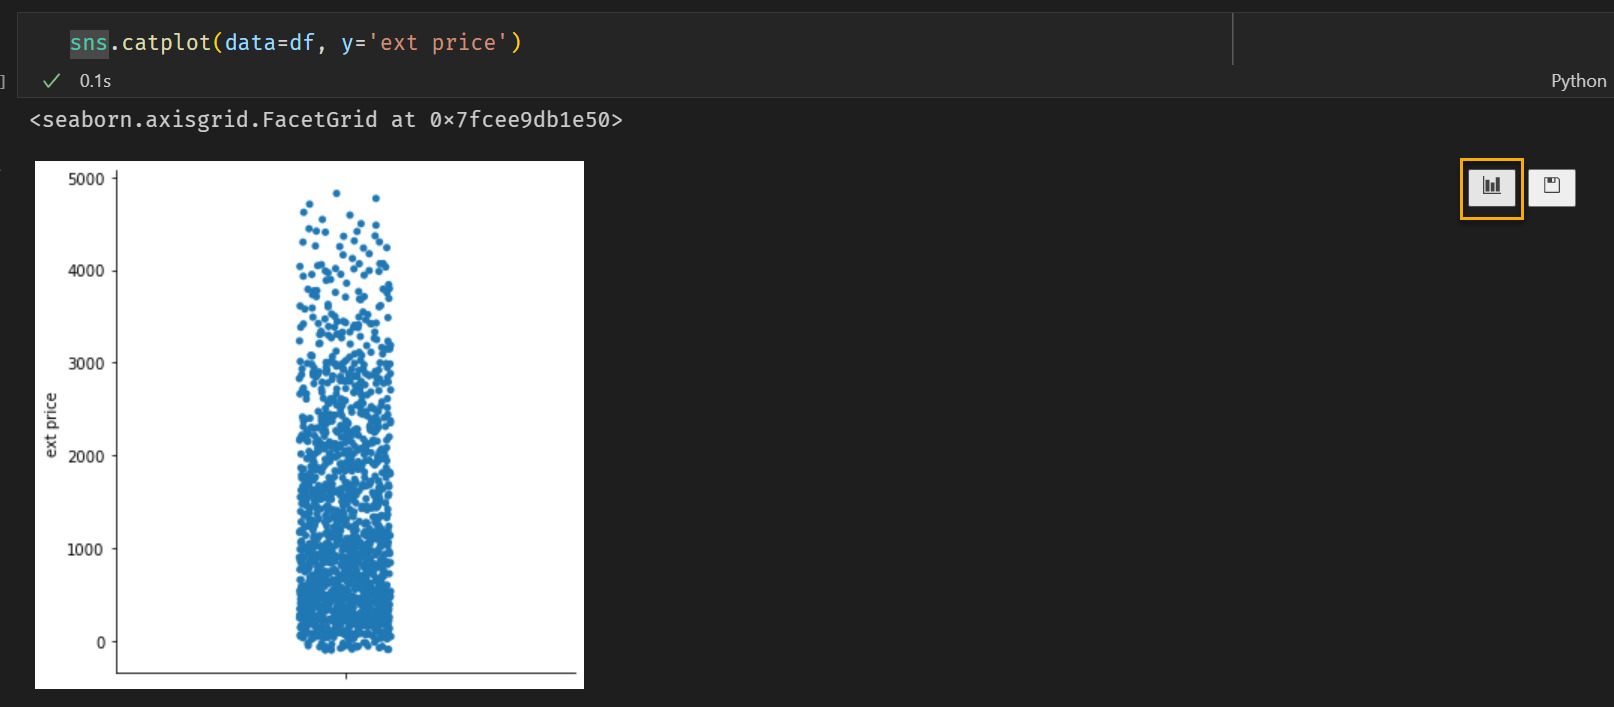
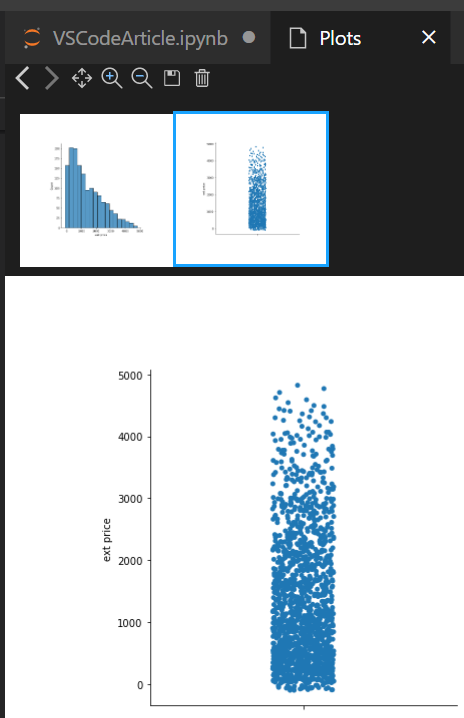
15 - Viewing plots
VS Code supports visualizations just like a standard notebook. In addition, you can view all of the different plots in a separate tab. I find it helpful to have all plots in one place for side by side analysis.
There are additional options for saving and viewing the plots.
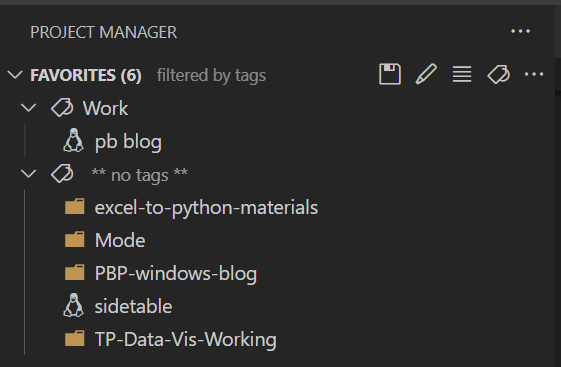
16 - Plugins
VS Code has 100’s (maybe 1000’s) of additional plugins that you may want to use in your environment. One of the ones I like quite a bit is Project Manager. I use this to group my various projects together and quickly launch VS Code with all the code in one place.
Summary
I have been using VS Code for notebook development for the past several weeks. It has taken some time to get used to the new workflow but I think I am going to continue with this approach.
Many of these features in this article have only been in place for a few months. So, I am excited to see what the development looks like and what new features the community will develop in the future.
Let me know in the comments if you have any other experience with using some of these new features in your own development process. Also, if you have any plugins that help with notebook development, I’d be interested in hearing about them.
Comments