Collecting Data with Google Forms and Pandas
Posted by Chris Moffitt in articles
Introduction
Google Forms is a service that allows you to collect information via simple web forms. One of the useful features is that the forms will automatically save your data to a Google Sheet. This article will walk through how to create a form, authenticate using OAuth 2 and read all the responses into a pandas dataframe. Because the initial setup and authentication process is a little time consuming, this article will be the first in a two part series.
Before going too far, if you would like to take the short survey, here is the link to the survey we will discuss. Thanks in advance for filling it out!
Why would someone want to use pandas to read a Google Sheet? The key functionality this setup provides is a simple way to allow a large number of people to provide you information (don’t just think of a standard survey) and collect it all in a single place. You can then analyze the data with the full power of python and pandas. Google takes care of making sure that all the data gets consistently entered into one clean format - no matter how many people access the form.
This blog has mentioned many times about how Excel can be a great tool but is so often abused and made to do more than it really should. One use case I have seen is creating a simple Excel-based form which someone sends to people to fill out, then collate into a master spreadsheet. This process is extremely manual and error prone. Google Forms is a possible alternative to the spreadsheet wrangling you might do with Excel.
The other scenario is that sometimes you need a very simple UI to capture information and act on it. Once you start to play around with Google Forms you may realize that there are other uses for it outside of the standard survey process.
Overview
As they say, a picture is worth a thousand words; so here is what we’ll be doing in this article:
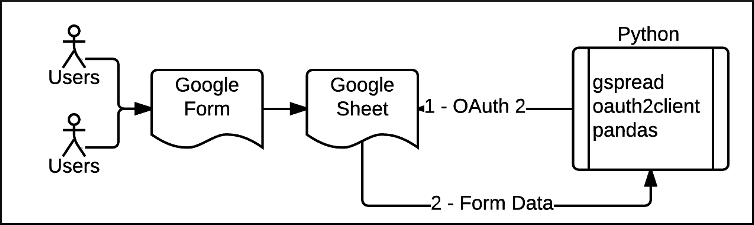
Form Creation
The first part of the process is creating the Form. If you haven’t used Forms before, go to Google Forms to learn more about the service and what it can be used for.
Once you decide to create your form, you’ll be shown a screen similar to this:
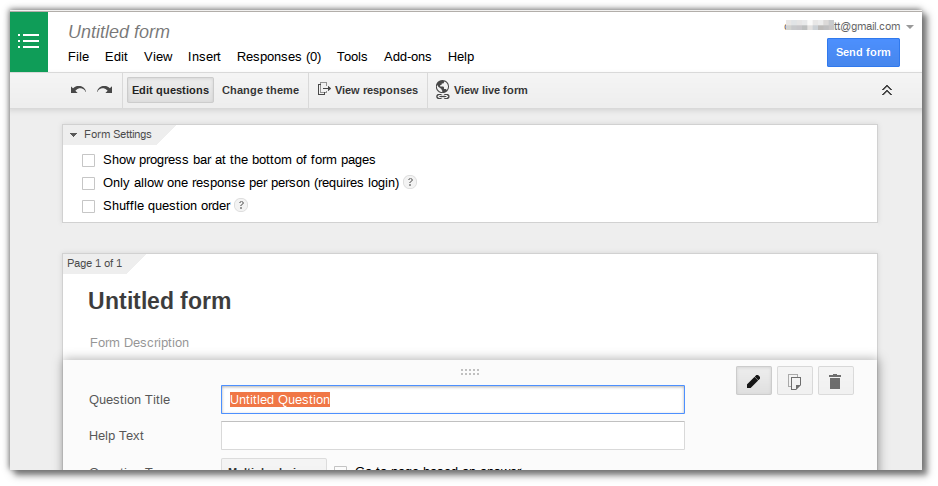
Go ahead and create a Form. It is all fairly intuitive.
The main thing you need to pay attention to is the name of the form. In this case - PBPython User Survey.
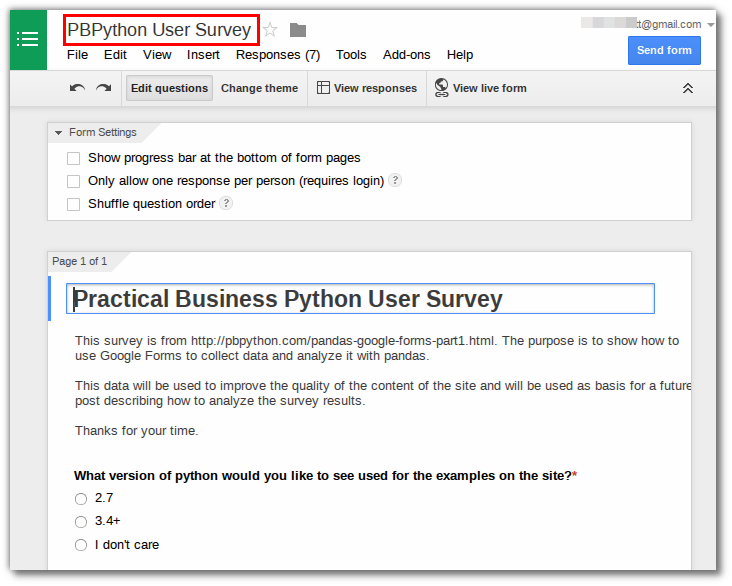
When you are ready, you can publish the survey by clicking on the Send form button. Here is the link to the survey for this site.
Now that you have the basic form set up, it is ready to store your data in a Google Sheet. The next step is setting up access so that your python script can connect to Google and download the data.
Authentication
In the good old days, you could authenticate with something as simple as an email address and password. However, this simplicity was very unsecure so one of the attempts to make a more secure process is OAuth 2.0
I won’t go into the details of OAuth 2.0 but the basic summary is that it is an open standared that defines a protoccol for granting access to resources. The key here is that it is a protoccol so there are several steps in the process to get it set up. The other bad news is that everyone tends to implement things slightly differently so you need to understand each provider’s setup. The good news is that once it is setup, it should run without further intervention and it is more secure than the old username + password combo!
The basic steps we will follow are:
- Enable the API
- Create our credentials
- Enable sharing of the sheet to our email address associated with the credentials
Google Developer Console
The first step in getting authentication working is to enable our google drive API.
Google has many API’s available to you and the Developer’s Console allows you to selectively turn on and off the various API’s. For our purposes, the Drive API must be enabled.
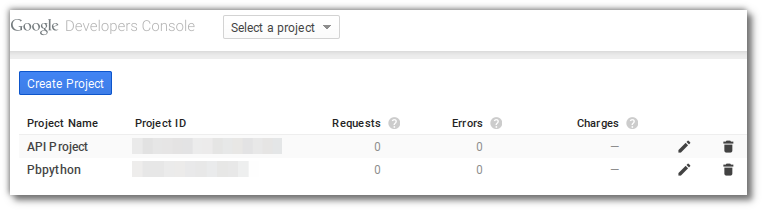
Go to the developers console and create a project (or use an existing one). Here is mine for Pbpython:
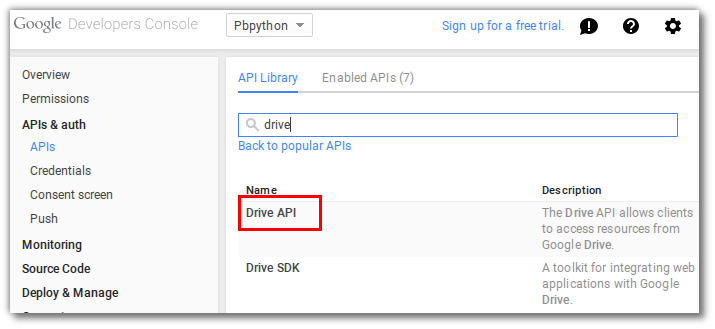
Once in your project, you need to enable to Google Drive API. You can search the API library for Drive API and enable it:
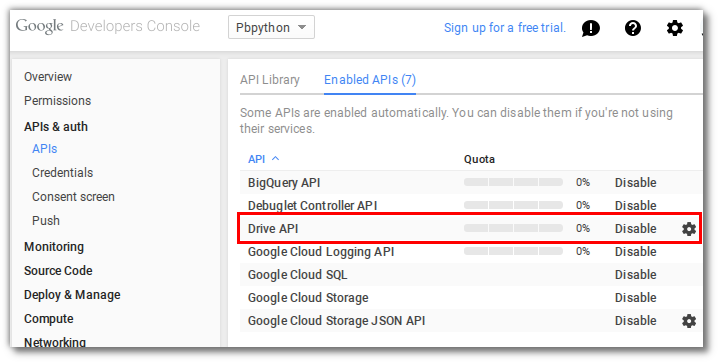
Here is what it looks like when it is enabled:
Once the API’s are enabled, you need to create your credentials.
One quick aside on credentials: there are three options for the types of credentials you can use:
- Web Applications
- Native Applications
- Service account
The Web Application would be useful if you were building a web app (shocking) and the user could interact with the site to enable access. The problem for our case is that this application will be run from the command line so it will not be a good fit for our solution.
The Native Application ID looks like it might be useful but when you dive into it some more you will learn that it does not support the roles that we need; so it does not work.
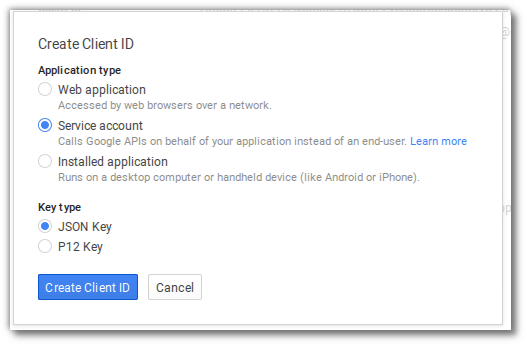
The Service account ID is meant to be used for these types of scripts so make sure you create one and select the JSON key.
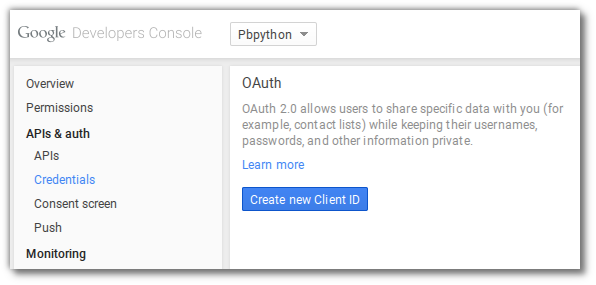
The first step is to click “Create new Client ID”:
Then Create a client ID for the Service account. Make sure to select JSON key for the key type.
You will get a prompt to download the JSON key:
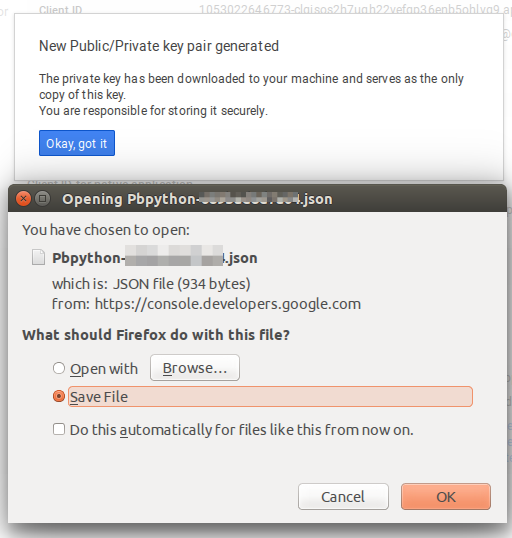
Make sure to save the JSON key somewhere safe and not to check it into a public version control system!
Finally, here is what the Service Account screen looks like:

Keep track of the email address. You will need it in a bit.
Sharing the Google Sheet
So now that you have your key, and have enabled your API, you need to allow the google sheet to be accessed by the user specified in the email address that was created for the service account.
Go into your drive and enable sharing of that response sheet to the email you have listed.
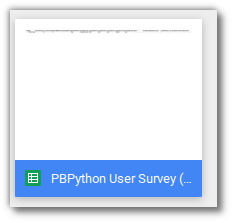
From your Google Drive, find the response sheet. In this case, PBPython User Survey (results) and right click on it:
You will need to share this with the email address from your Service Account email:
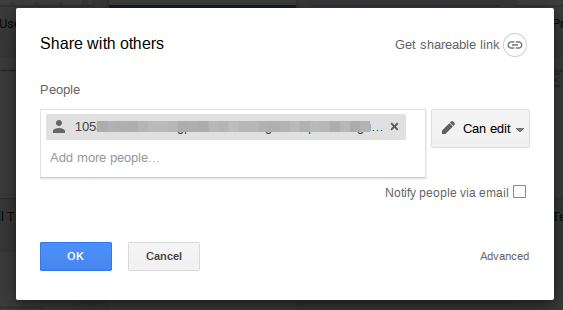
Click ok:
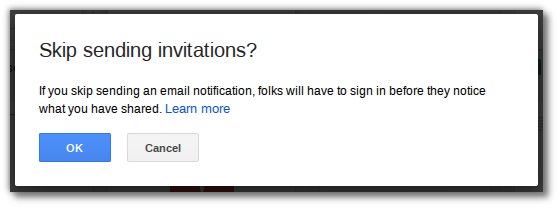
Go ahead and click ok. There is no one to send the invites to so you should be good.
Ok. That’s a lot of initial setup work. However, I hope that the steps I’ve laid out are clear enough so that you won’t stumble through it as much as I did!
Python Libraries
We will use to two python libraries to make the authentication and data extraction simple.
First install gspread
pip install gspread
This library allows us to easily access, then read and write google sheets. The authentication documentation I show above is heavily based on the gspread docs. You should check them out to learn all about the options available to you with this app. We will only be using a very small portion for this exercise.
In order to use OAuth 2 authentication I will be using google’s oauth2client
pip install oauth2client
Connect to Google
We are almost there!
The final two pieces of the puzzle are determining the scope we need access to and what type of OAuth 2 flow we are using. Scopes are simply a way of managing how much information you can have access to once you authenticate. In this example, we need to make sure we have access to the following scope:
https://spreadsheets.google.com/feeds
OAuth 2 has multiple types of authentication methods. I won’t go into the differences
between them but for the purposes of this script, we will used
SignedJwtAssertionCredentials
.
Don’t worry if this doesn’t make sense right now. You’ll use it in a second. Now we will piece together the script.
Let’s setup our imports:
from __future__ import print_function
import gspread
from oauth2client.client import SignedJwtAssertionCredentials
import pandas as pd
import json
As you can see, I’ve imported the
print_function
to keep this python 2/3
compatible as well as the
gspread
module and
SignedJwtAssertionCredentials
as described above. I am also going to use the
json
module to read our secret file for
the authentication handshake.
The next step is to define a couple of variables:
SCOPE = ["https://spreadsheets.google.com/feeds"]
SECRETS_FILE = "Pbpython-key.json"
SPREADSHEET = "PBPython User Survey (Responses)"
As mentioned earlier, you are required to pass the
SCOPE
when authenticating so just
know that this allows you to access and read a google sheet. The
SECRETS_FILE
is the name of the json file you downloaded from the google developer console.
This script will assume that the file is in the same directory as your script.
The
SPREADSHEET
variable is the name of the google sheet where the results are stored.
Now that everything is set up, let’s authenticate to google by reading in our
json key and using
SignedJwtAssertionCredentials
:
json_key = json.load(open(SECRETS_FILE))
# Authenticate using the signed key
credentials = SignedJwtAssertionCredentials(json_key['client_email'],
                                            json_key['private_key'], SCOPE)
It was a lot of work to get to these two lines of code but this is where the authentication magic happens.
To recap those two lines, we read in the
SECRETS_FILE
which will look
something like this:
{
  "private_key_id": "ABCXXX",
  "private_key": "-----BEGIN PRIVATE KEY-----\nXXXYY\n-----END PRIVATE KEY-----\n",
  "client_email": "YYYYYY@developer.gserviceaccount.com",
  "client_id": "1233XXXXX.apps.googleusercontent.com",
  "type": "service_account"
}
We take out the email, and private key, combine it with our scope and authenticate to google. If all works, google will give us some valid credentials.
Once you have the credentials, you can authenticate with google sheets using
gspread.authorize
:
gc = gspread.authorize(credentials)
If you want to see which sheets are available, this code will return all that you can access:
print("The following sheets are available")
for sheet in gc.openall():
    print("{} - {}".format(sheet.title, sheet.id))
Here is what it looks like for my site:
The following sheets are available
PBPython User Survey (Responses) - 1QsZXXXXXXaPjEIhI
Test Form For PBPython (Responses) - 1mFMXXXXQyYnXeA
If you can not see any sheets here, make sure you have shared them to the correct email.
To access our specific sheet:
workbook = gc.open(SPREADSHEET)
# Get the first sheet
sheet = workbook.sheet1
Once we have the sheet, it only takes one line to read it into a DataFrame and use all the pandas power you are used to!
data = pd.DataFrame(sheet.get_all_records())
After all that work, we’re now home free.
Simple Pandas Manipulation
Once you get the data into your dataframe, you can do whatever you would like. In the follow-on article, I will go through some more details but here are two simple steps that will make further manipulation easier.
First, the column names are the full text of the question. Trying to work with this would be highly painful. I recommend renaming all the columns to shorter names. Here is how I did it with this example:
column_names = {'Timestamp': 'timestamp',
                'What version of python would you like to see used for the examples on the site?': 'version',
                'How useful is the content on practical business python?': 'useful',
                'What suggestions do you have for future content?': 'suggestions',
                'How frequently do you use the following tools? [Python]': 'freq-py',
                'How frequently do you use the following tools? [SQL]': 'freq-sql',
                'How frequently do you use the following tools? [R]': 'freq-r',
                'How frequently do you use the following tools? [Javascript]': 'freq-js',
                'How frequently do you use the following tools? [VBA]': 'freq-vba',
                'How frequently do you use the following tools? [Ruby]': 'freq-ruby',
                'Which OS do you use most frequently?': 'os',
                'Which python distribution do you primarily use?': 'distro',
                'How would you like to be notified about new articles on this site?': 'notify'
                }
data.rename(columns=column_names, inplace=True)
Finally, since we have timestamps, let’s convert the timestamp column to an actual pandas time series:
data.timestamp = pd.to_datetime(data.timestamp)
Full Code Example
I know it has taken a while to get to the end of this article. While the steps may seem a bit daunting, once you do it once, it will be simple to do it again for future forms.
Speaking of forms, here is the link to the survey please take a moment to fill it out. Having more data will make the survey that much more useful for the next article.
Here is the complete code snippet. It is also available on github:
from __future__ import print_function
import gspread
from oauth2client.client import SignedJwtAssertionCredentials
import pandas as pd
import json

SCOPE = ["https://spreadsheets.google.com/feeds"]
SECRETS_FILE = "Pbpython-key.json"
SPREADSHEET = "PBPython User Survey (Responses)"
# Based on docs here - http://gspread.readthedocs.org/en/latest/oauth2.html
# Load in the secret JSON key (must be a service account)
json_key = json.load(open(SECRETS_FILE))
# Authenticate using the signed key
credentials = SignedJwtAssertionCredentials(json_key['client_email'],
                                            json_key['private_key'], SCOPE)

gc = gspread.authorize(credentials)
print("The following sheets are available")
for sheet in gc.openall():
    print("{} - {}".format(sheet.title, sheet.id))
# Open up the workbook based on the spreadsheet name
workbook = gc.open(SPREADSHEET)
# Get the first sheet
sheet = workbook.sheet1
# Extract all data into a dataframe
data = pd.DataFrame(sheet.get_all_records())
# Do some minor cleanups on the data
# Rename the columns to make it easier to manipulate
# The data comes in through a dictionary so we can not assume order stays the
# same so must name each column
column_names = {'Timestamp': 'timestamp',
                'What version of python would you like to see used for the examples on the site?': 'version',
                'How useful is the content on practical business python?': 'useful',
                'What suggestions do you have for future content?': 'suggestions',
                'How frequently do you use the following tools? [Python]': 'freq-py',
                'How frequently do you use the following tools? [SQL]': 'freq-sql',
                'How frequently do you use the following tools? [R]': 'freq-r',
                'How frequently do you use the following tools? [Javascript]': 'freq-js',
                'How frequently do you use the following tools? [VBA]': 'freq-vba',
                'How frequently do you use the following tools? [Ruby]': 'freq-ruby',
                'Which OS do you use most frequently?': 'os',
                'Which python distribution do you primarily use?': 'distro',
                'How would you like to be notified about new articles on this site?': 'notify'
                }
data.rename(columns=column_names, inplace=True)
data.timestamp = pd.to_datetime(data.timestamp)
print(data.head())
Thank you for reading all the way to the end. I hope this is helpful to you and I look forward to reviewing the survey results with you.
Comments