Configuring Pelican Static Blog
Posted by Chris Moffitt in articles
Background
The first part of this series explains why I chose Pelican for this blog. This article goes into more detail around the steps I took to install and configure it for pbpython.
Install the base components
- Similar to other tutorials, use virtualenv to install pelican into an isolated environment on the system:
$ mkvirtualenv pbpython-site
$ pip install pelican
$ pip install Pillow beautifulsoup4 cssmin cssprefixer cssutils pretty six smartypants typogrify webassets
- Now do the pelican configuation:
$ pelican-quickstart

Please answer the following questions so this script can generate the files
needed by Pelican.


> Where do you want to create your new web site? [.]
> What will be the title of this web site? Practical Business Python
> Who will be the author of this web site? Chris Moffitt
> What will be the default language of this web site? [en]
> Do you want to specify a URL prefix? e.g., http://example.com   (Y/n) Y
> What is your URL prefix? (see above example; no trailing slash) http://pbpython.com
> Do you want to enable article pagination? (Y/n) Y
> How many articles per page do you want? [10]
> Do you want to generate a Fabfile/Makefile to automate generation and publishing? (Y/n) Y
> Do you want an auto-reload & simpleHTTP script to assist with theme and site development? (Y/n)
> Do you want to upload your website using FTP? (y/N) N
> Do you want to upload your website using SSH? (y/N) N
> Do you want to upload your website using Dropbox? (y/N) N
> Do you want to upload your website using S3? (y/N) Y
> What is the name of your S3 bucket? [my_s3_bucket] pbpython.com
> Do you want to upload your website using Rackspace Cloud Files? (y/N) N
> Do you want to upload your website using GitHub Pages? (y/N) N
Done. Your new project is available at /home/chris/src/pbpython-site

$ ls
content  develop_server.sh  fabfile.py  Makefile  output  pelicanconf.py  publishconf.py
One additional thing I wanted to do is to make sure I have access to the pelican plugins on github.
- Add the plugins:
$ git clone https://github.com/getpelican/pelican-plugins.git
$ ls
content  develop_server.sh  fabfile.py  Makefile  output  pelicanconf.py  pelican-plugins  publishconf.py
I also wanted to make sure to install all the various themes so I could experiment and see what I liked best.
Note
Ensure you use the
--recursivedirective to clone the github repo
- Add the themes:
$ git clone --recursive https://github.com/getpelican/pelican-themes ./pelican-themes
$ ls
cache  content  develop_server.sh  fabfile.py  Makefile  output  pelicanconf.py  pelicanconf.pyc  pelican-plugins  pelican-themes  publishconf.py
Now that these themes are available locally, you can view them by making the changes to your
publishconf.pyfile described below. In the example below, I set up the theme to use voidy-bootstrap but you can easily change this and see what other themes look like.
- Add paths to the plugins and themes:
THEME = "pelican-themes/voidy-bootstrap"
PLUGIN_PATHS = ['pelican-plugins']
PLUGINS = ['assets']
I also wanted to set up some archives and use typogrify so I set those variables as well.
- Additional config:
TYPOGRIFY = True
YEAR_ARCHIVE_SAVE_AS = 'posts/{date:%Y}/index.html'
MONTH_ARCHIVE_SAVE_AS = 'posts/{date:%Y}/{date:%b}/index.html'
Workflow
Now you should have a basic environment set up. When you are ready to see how your site looks on your local machine, you can use the handy devserver to view it “live.”
- Run the devserver:
$ make devserver
One of the benefits of using a static blog engine is that you can store all the relevant files in a version control system. I am partial to mercurial and use bitbucket for my code hosting.
- I decided that there is no need to store the output file, so , here is what my
.hgignore
file looks like: $ cat .hgignore syntax: glob cache pelican-plugins pelican-themes output *.pyc *.pid
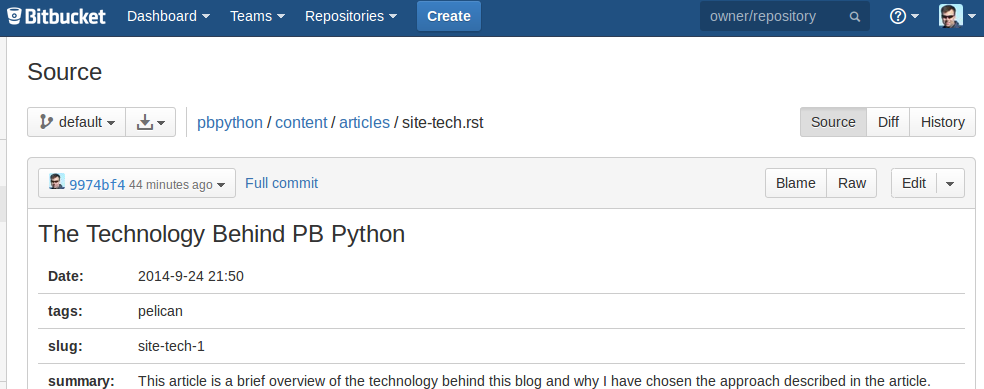
- Here is what the basic bitbucket screen looks like:

- There are two really cool features about saving the content on bitbucket:
- Bitbucket can interpret Restructured text files so it gives a nice rendering of the files.
- I can use the edit button to edit files directly.
Deployment and Hosting
The final piece of the static hosting blog puzzle is determining how to host the site. After doing some research, I decided to try hosting the files using Amazon’s S3 service.
After configuring the service according to the docs, I needed a method to sync the files. Installing and configuring
s3cmddid the trick.
- Configure s3:
$ pip install s3cmd
$ s3cmd --configure
- Whenever I need to deploy files to the s3 instance, I execute the following commands:
$ make publish
$ s3cmd sync ./output/ s3://pbpython.com/ --acl-public --delete-removed --guess-mime-type
Closing Thoughts
I hope this article helps you understand how to setup pelican for your own site and some of the advantages of using a static blog engine. Feel free to ask questions in the comments if anything is not clear.
Comments